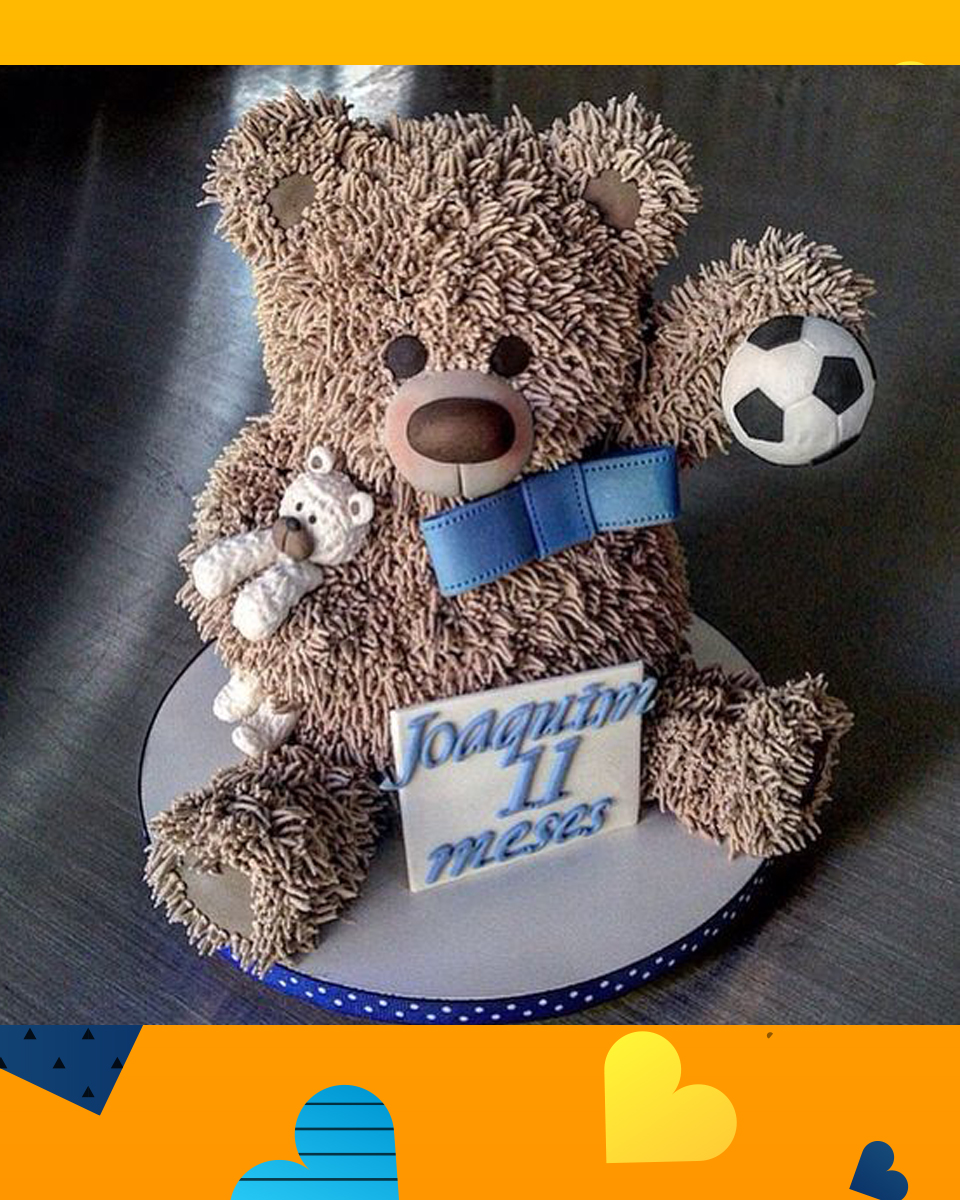
The Chocolate Bear Cake is an adorable and whimsical dessert that captures the hearts of both young and young-at-heart. This charming cake features a delightful bear design made entirely from rich and decadent chocolate cake layers. With meticulous craftsmanship and attention to detail, the cake’s shape resembles a cute bear, complete with round face, ears, and a sweet expression. The Chocolate Bear Cake is not only a visual delight but also a scrumptious treat for chocolate enthusiasts. Whether it’s a birthday celebration, a baby shower, or any special occasion, this cake brings a touch of enchantment and flavor to every slice.
What is Chocolate Bear Cake?
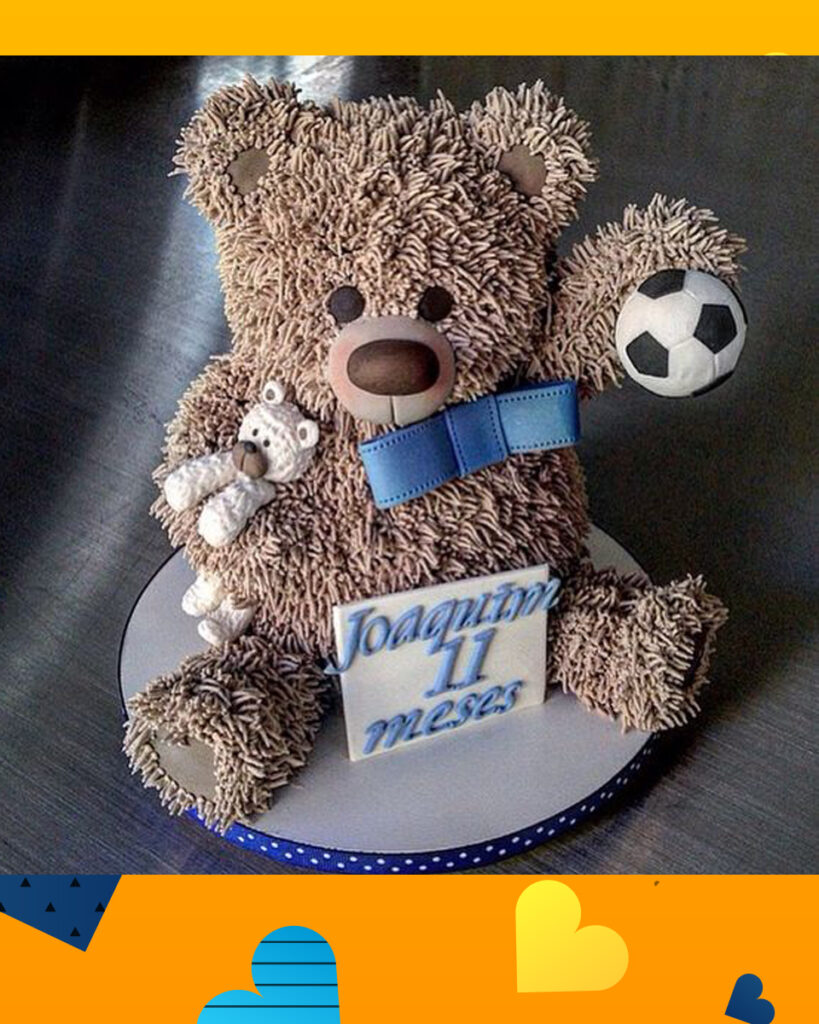
A Chocolate Bear Cake is a delightful and whimsical dessert that features a cake shaped and decorated to resemble an adorable bear. This creative and imaginative cake design is popular for a variety of occasions, especially children’s birthdays, baby showers, and animal-themed celebrations. The cake is typically made using chocolate cake layers and is decorated with chocolate frosting or ganache to mimic the appearance of a bear’s fur.
Key features of a Chocolate Bear Cake:
- Chocolate Cake Layers: The cake’s interior consists of layers of rich and moist chocolate cake. The deep chocolate flavor provides a delicious contrast to the cake’s exterior decoration.
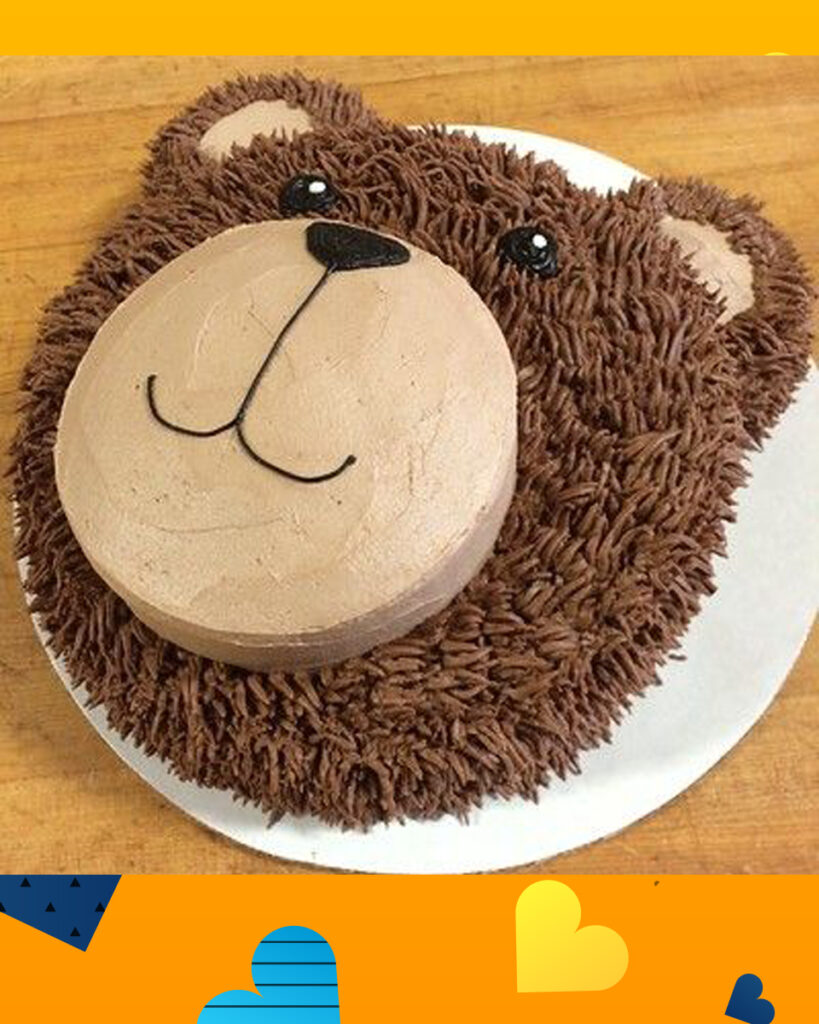
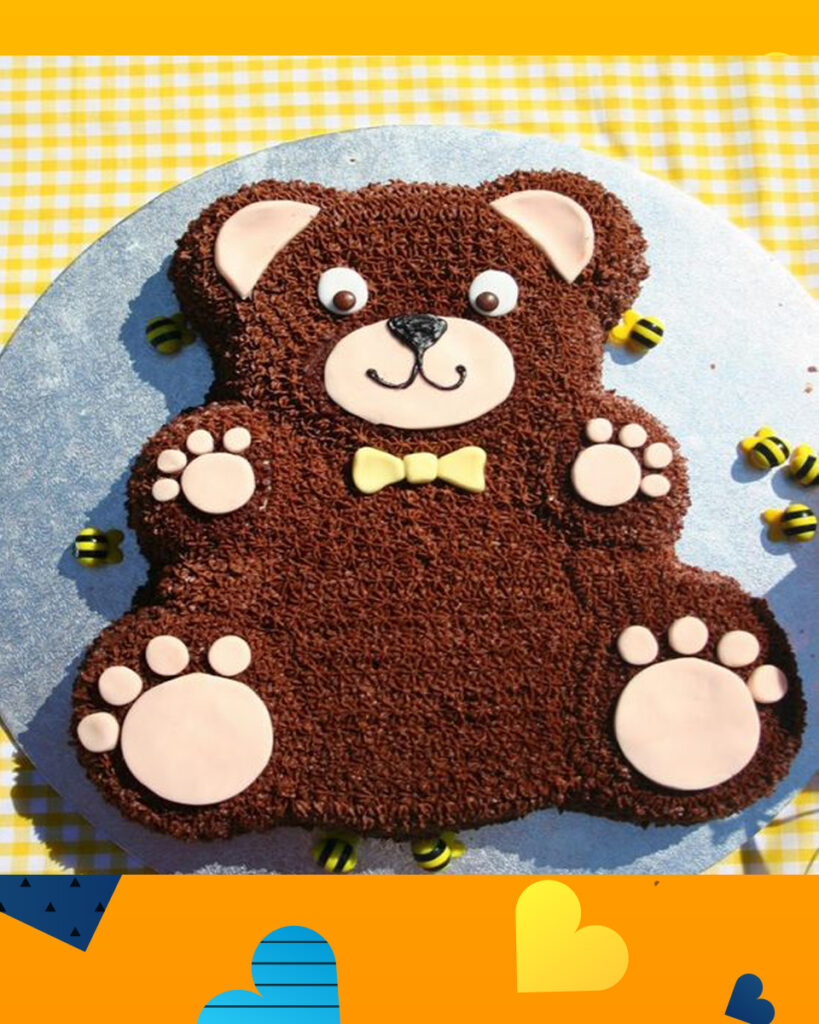
- Bear-Shaped Design: The cake is carved, assembled, and sculpted to form the shape of a bear. This includes creating the bear’s round face, snout, ears, and sometimes even paws.
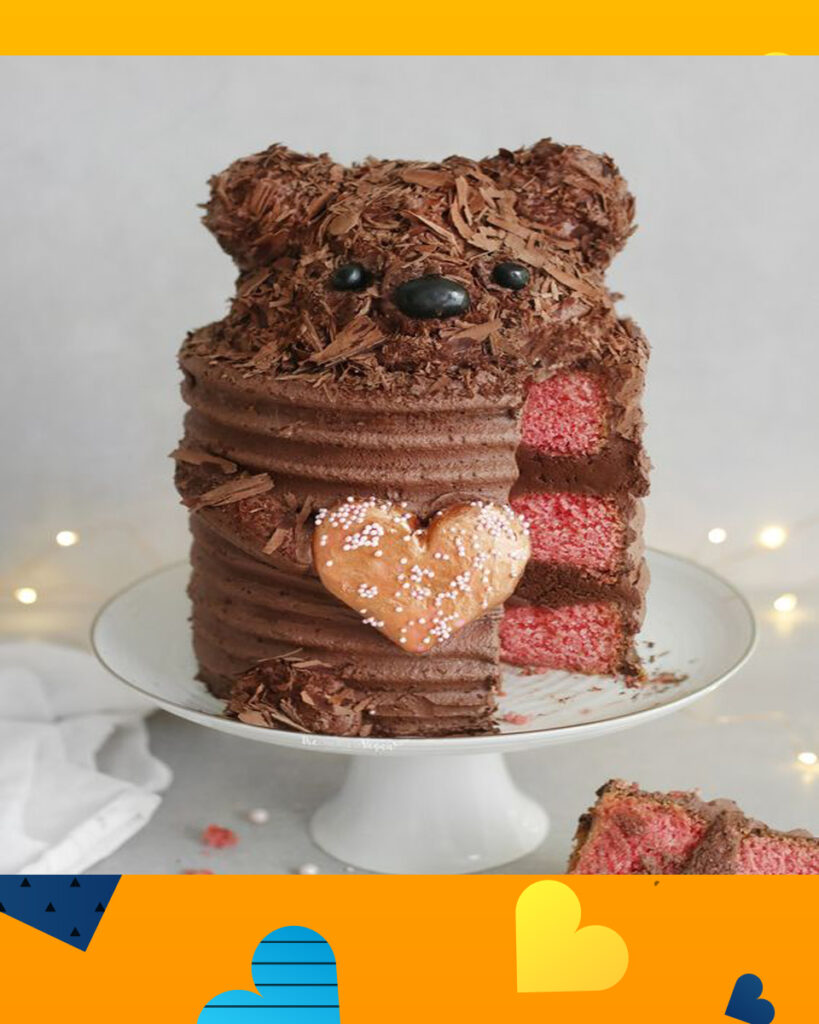
- Chocolate Fur Texture: To replicate the appearance of a bear’s fur, the cake is covered with a layer of chocolate frosting or ganache. This creates a textured and rustic finish reminiscent of fur.
- Decorative Details: The cake’s facial features, such as eyes, nose, mouth, and ears, are often crafted using fondant, modeling chocolate, or piped frosting. These details bring the bear’s expression to life.
- Customization: The cake’s design can be customized to fit various themes and preferences. Colors, accessories, and facial expressions can all be adjusted to create different bear characters.
- Size and Tiers: Chocolate Bear Cakes can vary in size and can be single-tier or multi-tiered, depending on the occasion and the number of servings needed.
- Charming and Playful: The whimsical nature of a Chocolate Bear Cake makes it a charming centerpiece for celebrations. It appeals to both children and adults who appreciate creative cake designs.
Creating a Chocolate Bear Cake requires some cake carving and decorating skills, but the end result is a show-stopping dessert that brings joy and excitement to any event. It’s a perfect way to combine the love of chocolate with the artistry of cake design.
Why you will love Chocolate Bear Cake?
There are several reasons why you’ll fall in love with a Chocolate Bear Cake:
- Adorable Aesthetics: The charming bear-shaped design of the cake is irresistibly cute and visually appealing, making it a delightful centerpiece for any celebration.
- Creative Expression: Baking and decorating a Chocolate Bear Cake allows you to unleash your creativity. You can customize the bear’s look, expressions, and accessories, making each cake unique.
- Whimsical Celebration: Whether it’s a child’s birthday, baby shower, or an animal-themed party, a Chocolate Bear Cake brings a touch of enchantment and whimsy to the occasion.
- Chocolate Decadence: Chocolate lovers will adore the combination of rich, moist chocolate cake layers with chocolate frosting or ganache. It’s a dream dessert for cocoa enthusiasts.
- Conversation Starter: A Chocolate Bear Cake is a conversation piece that will have everyone talking and admiring your baking skills. It’s a fantastic way to make your celebration memorable.
- Memorable Photos: The adorable and Instagram-worthy appearance of the cake ensures that it will be a hit on social media and in your photo album.
- Multi-Generational Appeal: The cuteness of the bear design appeals to both children and adults, making it a versatile choice for parties with guests of all ages.
- Unique Gifting Idea: Gifting a Chocolate Bear Cake to someone special showcases your thoughtfulness and the effort you put into creating a personalized and heartfelt present.
- Joyful Surprise: When you unveil the Chocolate Bear Cake at your event, the reactions of awe, smiles, and happiness from your guests will be priceless.
- Culinary Achievement: Successfully crafting and decorating a Chocolate Bear Cake is a satisfying culinary achievement that showcases your baking talents.
- Unforgettable Moments: The memories of cutting into the cake, revealing its delightful interior, and sharing it with loved ones will be cherished for years to come.
- Personalized Touch: By infusing your personality and artistic touch into the cake’s design, you’re able to create a cake that reflects your style and the theme of the celebration.
A Chocolate Bear Cake is more than just a dessert; it’s a creation that brings joy, creativity, and a sense of wonder to any gathering. Its combination of taste and aesthetics makes it an extraordinary treat that captures hearts and taste buds alike.
What type of frosting is best for the Chocolate Bear Cake?
The type of frosting that works best for a Chocolate Bear Cake depends on your preference, the desired texture, and the overall flavor profile you want to achieve. Here are a few frosting options that work well with a Chocolate Bear Cake:
- Chocolate Buttercream:
- Chocolate buttercream is a classic choice for a Chocolate Bear Cake. It’s rich, creamy, and complements the chocolate cake layers perfectly. You can adjust the intensity of the chocolate flavor by adding cocoa powder or melted chocolate.
- Chocolate Ganache:
- Chocolate ganache is a luxurious option that results in a glossy, smooth finish. It’s made with chocolate and heavy cream, creating a decadent layer that beautifully coats the cake. Ganache can be poured over the cake or spread for a slightly thicker layer.
- Cream Cheese Chocolate Frosting:
- If you’re a fan of the tangy flavor of cream cheese, consider using a cream cheese-based chocolate frosting. It adds a delightful balance of tanginess to the rich chocolate cake layers.
- Whipped Chocolate Ganache:
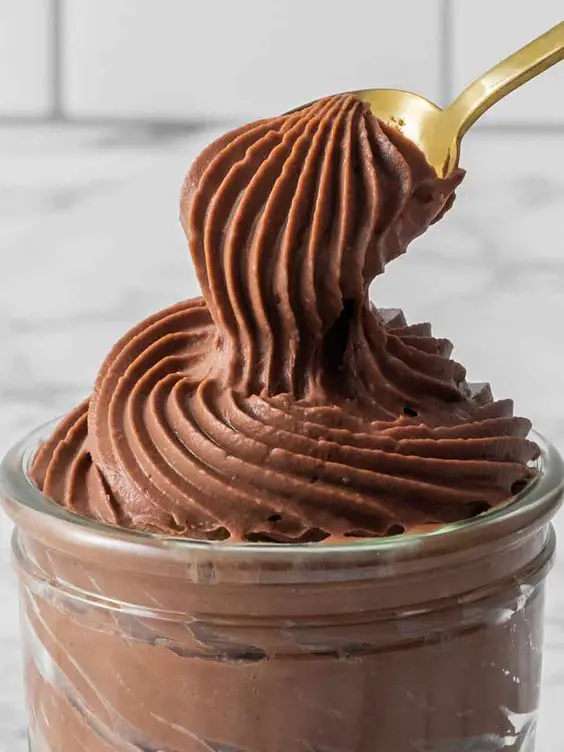
- Whipped chocolate ganache is a lighter and fluffier alternative to regular ganache. It’s made by whipping cooled ganache until it’s airy and spreadable. This frosting creates a velvety texture and intense chocolate flavor.
- Chocolate Swiss Meringue Buttercream:
- Swiss meringue buttercream is smooth, silky, and less sweet than traditional buttercream. Adding chocolate to it creates a sophisticated and less sugary frosting option.
- Dark Chocolate Cream Cheese Frosting:
- If you’re looking for a balance between tangy and chocolaty, a dark chocolate cream cheese frosting could be a fantastic choice. It combines the creaminess of cream cheese with the deep flavor of dark chocolate.
Remember that each type of frosting has its own application and texture. For creating the textured appearance of a bear’s fur on the Chocolate Bear Cake, you might lean towards a thicker frosting like chocolate buttercream or ganache. Regardless of the frosting you choose, make sure it complements the chocolate cake layers and suits your taste preferences for a delightful and visually appealing result.
Chocolate Bear Cake Recipe
Ingredients
For the Chocolate Cake Layers:
- 2 and ½ cups (300g) all-purpose flour
- 2 and ½ cups (500g) granulated sugar
- 1 cup (120g) unsweetened cocoa powder
- 2 and ½ teaspoons baking powder
- 1 and ½ teaspoons baking soda
- 1 and ½ teaspoons salt
- 3 large eggs
- 1 and ½ cups (360ml) whole milk
- ¾ cup (180ml) vegetable oil
- 2 teaspoons vanilla extract
- 1 and ½ cups (360ml) boiling water
For the Chocolate Buttercream:
- 1 cup (2 sticks or 226g) unsalted butter, softened
- 4 cups (480g) powdered sugar, sifted
- ½ cup (50g) unsweetened cocoa powder
- ¼ cup (60ml) whole milk or heavy cream
- 2 teaspoons vanilla extract
Instructions
For the Chocolate Cake Layers:
- Preheat Oven and Prepare Pans:
- Preheat your oven to 350°F (175°C). Grease and flour two 8-inch round cake pans.
- Mix Dry Ingredients:
- In a large bowl, whisk together the flour, sugar, cocoa powder, baking powder, baking soda, and salt until well combined.
- Add Wet Ingredients:
- Add the eggs, milk, vegetable oil, and vanilla extract to the dry ingredients. Mix on medium speed with an electric mixer until smooth.
- Add Boiling Water:
- Gradually add the boiling water to the batter while mixing on low speed. The batter will be thin, but that’s normal.
- Bake:
- Divide the batter evenly between the prepared pans. Bake in the preheated oven for 25-30 minutes, or until a toothpick inserted into the center of the cakes comes out clean.
- Cool and Prepare Cake:
- Allow the cakes to cool in the pans for 10 minutes, then transfer them to wire racks to cool completely.
For the Chocolate Buttercream:
- Cream Butter:
- In a large mixing bowl, beat the softened butter with an electric mixer until creamy and smooth.
- Add Cocoa and Sugar:
- Gradually add the sifted powdered sugar and cocoa powder to the butter, mixing on low speed to prevent a cloud of sugar. Scrape down the sides of the bowl as needed.
- Add Milk and Vanilla:
- Add the milk or heavy cream and vanilla extract to the mixture. Mix on low speed initially to avoid splattering, then increase to medium-high and beat until the frosting is smooth and creamy.
- Adjust Consistency:
- If the frosting is too thick, add a bit more milk or cream. If it’s too thin, add more powdered sugar until you reach the desired consistency.
Assembling the Chocolate Bear Cake
- Carve Cake:
- Carve the cooled cake layers to shape the bear’s body, head, ears, and snout. Follow a template or a reference image.
- Crumb Coat:
- Apply a thin layer of chocolate buttercream to the carved cake layers to create a crumb coat. Chill in the refrigerator for about 15-20 minutes.
- Frost and Decorate:
- Apply a thicker layer of chocolate buttercream to the crumb-coated cake. Use an offset spatula and/or piping bags to create the bear’s fur texture, facial features, and any desired accessories.
- Enjoy:
- Once decorated, your Chocolate Bear Cake is ready to be enjoyed! Slice and serve to delight your guests.
This formula provides step-by-step instructions to create a delicious and visually appealing Chocolate Bear Cake that’s perfect for celebrating special occasions. Remember that cake decorating can require practice, so don’t hesitate to experiment and have fun with the design!
Nutrition information
Please note that the provided nutrition information is an approximate estimate and can vary based on factors such as specific ingredients used and serving sizes. To get the most accurate nutritional information, it’s recommended to input the exact ingredients and quantities into a reliable nutrition calculator.
Nutritional Information (Approximate) for 1 Serving of Chocolate Bear Cake (1/12 of the cake):
- Calories: Around 450 kcal
- Total Fat: Approximately 22g
- Saturated Fat: Around 12g
- Trans Fat: Minimal
- Cholesterol: Roughly 75mg
- Sodium: About 340mg
- Total Carbohydrates: Around 63g
- Dietary Fiber: Approximately 3g
- Sugars: Around 45g
- Protein: Roughly 5g
Keep in mind that these values are based on the ingredients and quantities provided in the formula. If you use different brands or alter the quantities, the nutritional content may vary. Additionally, the frosting and any decorations on the cake can contribute to the overall nutritional content.
How to decorate Chocolate Bear Cake
Decorating a Chocolate Bear Cake can be a fun and creative process. Here’s a step-by-step guide to help you decorate your cake and bring your adorable bear design to life:
Materials You’ll Need:
- Prepared and carved chocolate cake layers
- Chocolate buttercream or frosting of your choice
- Piping bags and various piping tips (star tips, round tips, etc.)
- Fondant (for details like eyes, nose, and accessories)
- Food-safe gel coloring (for tinting frosting and fondant)
- Offset spatula
- Bench scraper
- Edible markers (for drawing details on fondant)
- Optional: edible glitter, sprinkles, or other decorations
Decoration Steps:
- Crumb Coat:
- Apply a thin layer of chocolate buttercream to the carved cake layers to create a crumb coat. This helps seal in crumbs and provides a smooth base for the final layer of frosting.
- Base Layer of Frosting:
- After the crumb coat has chilled for a bit, apply a thicker layer of chocolate buttercream to the cake. Use an offset spatula to spread the frosting evenly across the cake’s surface. Don’t worry about achieving a perfectly smooth finish at this stage.
- Creating Fur Texture:
- To achieve the bear’s fur texture, use an offset spatula or a bench scraper to create upward strokes in the frosting. This mimics the look of fur. Work your way around the entire cake.
- Adding Facial Features:
- Use fondant to create the bear’s eyes, nose, and mouth. You can shape small balls of black fondant for the eyes and nose, and use an edible marker to draw the mouth. Attach these details to the cake using a small amount of frosting.
- Ears and Accessories:
- If your bear design includes ears or accessories, use fondant to shape them. Attach the ears to the cake using frosting or edible glue. You can also use fondant to create bows, hats, or other accessories to add personality to your bear.
- Piping Details:
- Use piping bags and tips to pipe additional details like rosettes, swirls, or borders around the cake. You can use contrasting frosting colors to create interest.
- Eyes and Eyebrows:
- Add white fondant highlights to the eyes to give them a lively look. You can also use fondant to create raised eyebrows for expression.
- Fine Details:
- Use edible markers to add fine details like eyelashes, mouth lines, or other accents.
- Finishing Touches:
- Add any final touches such as sprinkles, edible glitter, or additional decorations that match the theme or design of your cake.
- Step Back and Evaluate:
- Once you’re satisfied with the decorations, step back and evaluate the overall look of the cake. Make any final adjustments if needed.
- Presentation:
- Place your beautifully decorated Chocolate Bear Cake on a cake stand or platter and present it with pride!
Remember that decorating takes practice, and your first attempt might not be perfect. The key is to have fun, be patient, and enjoy the creative process. Your Chocolate Bear Cake will surely capture hearts and smiles, regardless of the level of detail you choose to add.
Tips to make perfect Chocolate Bear Cake
Creating a perfect Chocolate Bear Cake involves attention to detail and some helpful techniques. Here are tips to ensure your cake turns out beautifully:
- Plan Ahead:
- Sketch out your bear design and plan the color scheme and decorations in advance. This will help you visualize the final result.
- Use Quality Ingredients:
- Choose high-quality cocoa powder, chocolate, and other ingredients to ensure a rich and flavorful cake.
- Properly Grease and Flour Pans:
- Grease and flour your cake pans thoroughly to prevent the cake from sticking and ensure easy release.
- Even Cake Layers:
- Measure and divide the cake batter evenly between pans for consistent cake layers. Use a kitchen scale for precision.
- Proper Carving Tools:
- Use a serrated knife or cake leveler to carve the cake into the bear shape. Take your time to achieve smooth and accurate cuts.
- Crumb Coat:
- Apply a thin crumb coat of frosting to seal in crumbs before the final layer. This helps create a smooth surface for decorating.
- Texture Creation:
- Achieve the bear’s fur texture by using an offset spatula or bench scraper to create upward strokes in the frosting. Practice this technique on a separate surface if needed.
- Consistency of Frosting:
- Make sure your chocolate buttercream is at the right consistency. It should be spreadable but not too soft that it loses its shape.
- Decorate in Stages:
- Break down the decorating process into stages. Start with the base layer of frosting, then move on to details like eyes, nose, and accessories.
- Color Gradation:
- If you’re using multiple shades of frosting, ensure a smooth color transition by blending colors slightly where they meet.
- Patience with Details:
- Take your time when adding facial features and accessories. Use small piping tips and fondant tools for precise work.
- Practice Piping:
- If you’re piping details, practice on a separate surface to get comfortable with different piping tips and techniques.
- Be Open to Imperfections:
- Handmade cakes can have charming imperfections. Embrace any small irregularities as part of the cake’s character.
- Chill Between Steps:
- Chill the cake in the refrigerator between stages, especially if it’s a warm environment. This helps the frosting set and maintain its shape.
- Stay Organized:
- Keep your decorating tools, fondant, and accessories organized and within reach to save time and minimize stress.
- Evaluate and Adjust:
- Step back and evaluate your cake’s progress frequently. Make adjustments as needed to achieve the desired look.
- Have Fun:
- The most important tip is to enjoy the process! Decorating should be fun and creative, so embrace the journey.
Remember, practice makes perfect. Don’t be discouraged if your first attempt isn’t flawless. Each cake you make will help you refine your skills and techniques.
How to serve
Serving a Chocolate Bear Cake can be a delightful experience for you and your guests. Here’s how to present and serve the cake with a touch of flair:
- Clean Presentation:
- Ensure the cake is on a clean, flat surface or cake stand before serving.
- Cake Cutting Tools:
- Have a sharp serrated knife and a cake server or spatula ready for cutting and serving.
- Positioning:
- Place the cake in a central location where everyone can easily see and admire the bear design.
- Announce the Cake:
- If you’re hosting a party or gathering, make a fun announcement to gather everyone’s attention before cutting the cake.
- Serve Individual Slices:
- Use the serrated knife to cut the cake into even slices. Gently slide the cake server or spatula under each slice to lift it onto a dessert plate.
- Garnish:
- Optionally, add a small dollop of whipped cream, a drizzle of chocolate sauce, or a sprinkle of cocoa powder on top of each slice for extra flavor and visual appeal.
- Serve with Complementary Treats:
- Serve the cake with complementary treats such as a scoop of vanilla ice cream, fresh berries, or a cup of coffee or tea.
- Enjoy the Moment:
- Encourage your guests to savor each bite and appreciate the effort that went into creating the adorable Chocolate Bear Cake.
- Capture Memories:
- Don’t forget to take photos of the cake and your guests enjoying it. The cake’s cuteness and your guests’ reactions make for wonderful memories.
- Share the Story:
- If you’ve created the cake for a special occasion, share a brief story about the inspiration behind the bear design or the event being celebrated.
- Relax and Enjoy:
- After serving, take a moment to enjoy a slice of the Chocolate Bear Cake yourself. Celebrate your accomplishment and the joy it brings to others.
- Leftovers:
- If there are leftovers, cover the cut edges of the cake with plastic wrap or place the remaining cake slices in an airtight container. Store them in the refrigerator to maintain freshness.
Serving the Chocolate Bear Cake is a wonderful opportunity to share your creativity and bring smiles to the faces of your guests. Enjoy the process of celebrating with delicious cake and the joy it brings to your event!
How to store
Storing a Chocolate Bear Cake properly is important to maintain its freshness and appearance. Here’s how to store your cake to ensure it stays delicious:
- Room Temperature:
- If the cake will be consumed within a day, it can be kept at room temperature, ideally in a cool and dry area away from direct sunlight and heat sources.
- Refrigeration:
- If the cake will not be consumed within a day or if it’s hot and humid, it’s best to store it in the refrigerator to prevent spoilage. The frosting can become soft or melt in warmer conditions.
- Covering:
- Whether at room temperature or in the refrigerator, cover the cake with a cake dome, a large overturned bowl, or plastic wrap to protect it from dust and odors.
- Airtight Container:
- For added protection, you can also place the cake in an airtight container before refrigerating or storing it at room temperature.
- Avoid Condensation:
- If you’re storing the cake in the refrigerator, be cautious about condensation forming on the cake when it’s taken out. Let the cake come to room temperature before removing any covering to avoid moisture from affecting the frosting.
- Separate Layers:
- If possible, store the cake layers separately from the carved and decorated sections. This prevents any pressure on delicate decorations.
- Avoid Strong Odors:
- Keep the cake away from strong-smelling foods in the refrigerator to prevent any transfer of flavors.
- Freezing:
- If you have leftover cake that won’t be consumed within a few days, consider slicing it into individual portions, wrapping them tightly in plastic wrap, and then placing them in an airtight container or freezer-safe bag. Frozen cake slices can be enjoyed later, though the texture might be slightly different upon thawing.
- Thawing:
- If you freeze cake slices, let them thaw in the refrigerator or at room temperature. Avoid microwaving as it can affect the texture.
- Serve Fresh:
- Cakes are best enjoyed fresh. If possible, serve the cake within a few days of baking and decorating to ensure the best taste and texture.
By following these storage tips, you can prolong the freshness of your Chocolate Bear Cake and continue to enjoy its adorable design and delicious flavor.
FAQ’s
- Can I customize the cake’s design? Absolutely! The design of the Chocolate Bear Cake can be customized to suit your preferences and the occasion. You can choose different colors, expressions, and even accessories to make the cake truly unique.
- What flavors can I use for the cake layers? While the exterior is chocolate, you can get creative with the cake layers. Popular options include chocolate, vanilla, red velvet, or even a combination of flavors for added variety.
- Can I make the cake in advance? Yes, you can prepare the cake layers in advance and freeze them until you’re ready to assemble and decorate the cake. This can help with time management for special occasions.
- What type of frosting is best for the Chocolate Bear Cake? A rich and smooth chocolate buttercream or chocolate ganache works well for both flavor and stability when creating the bear’s fur texture and overall design.
Troubleshooting Chocolate Bear Cake:
- Cracks in the Cake:
- If your cake layers have cracks, they might be overbaked. Use a toothpick to check for doneness, and consider adjusting your oven temperature or baking time.
- Uneven Cake Layers:
- Uneven layers can result from inaccurate measuring or uneven baking. Use a kitchen scale to measure ingredients, and ensure even baking by rotating the cake pans halfway through baking time.
- Frosting Doesn’t Stick:
- If the frosting doesn’t adhere well to the cake layers, try applying a thin layer of frosting (a “crumb coat”) first. This helps seal in crumbs and provides a smoother surface for the final layer of frosting.
- Frosting Texture Issues:
- If your frosting becomes too thick or too soft, you can adjust the consistency by adding more liquid (for thick frosting) or more powdered sugar (for soft frosting).
- Smoothing the Frosting:
- Achieving a smooth frosting finish might require practice. Using an offset spatula and a bench scraper can help create a clean and even surface.
- Bear’s Shape:
- Sculpting the bear’s shape might require some patience and carving skills. Use a template or reference image to guide your carving process.
- Decorations and Details:
- Adding intricate details like facial features and accessories can be challenging. Use small piping tips, modeling chocolate, or fondant to create these elements.
- Supporting the Cake:
- Depending on the cake’s size and weight, consider using dowels or supports to ensure the cake’s stability, especially if you’re creating a multi-tiered bear cake.
Remember that creating a Chocolate Bear Cake can be a fun and rewarding project, but it may require some trial and error. Don’t hesitate to experiment and learn from each attempt to achieve the best results.
