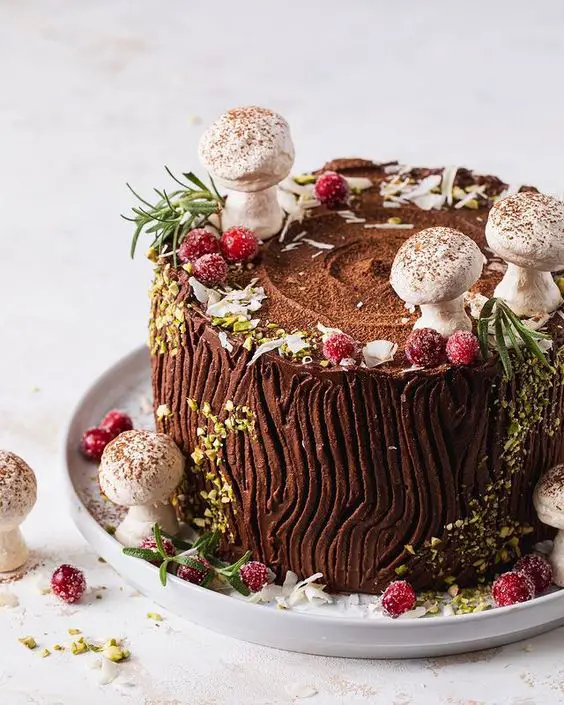
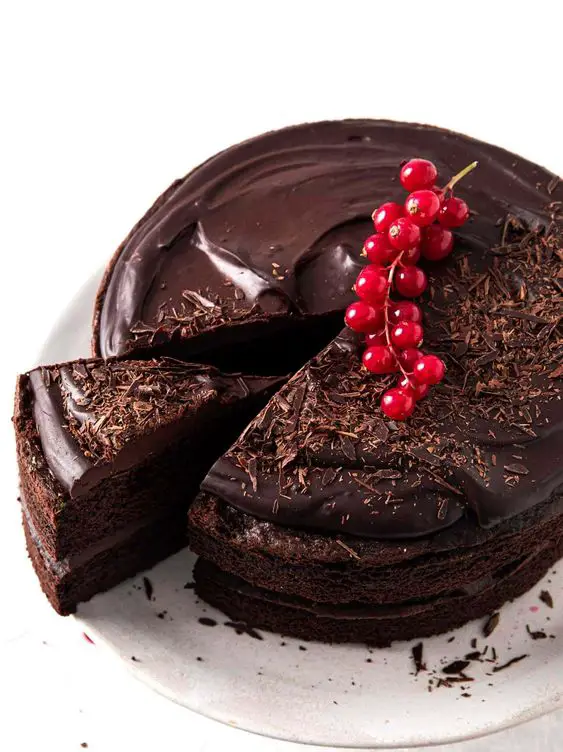
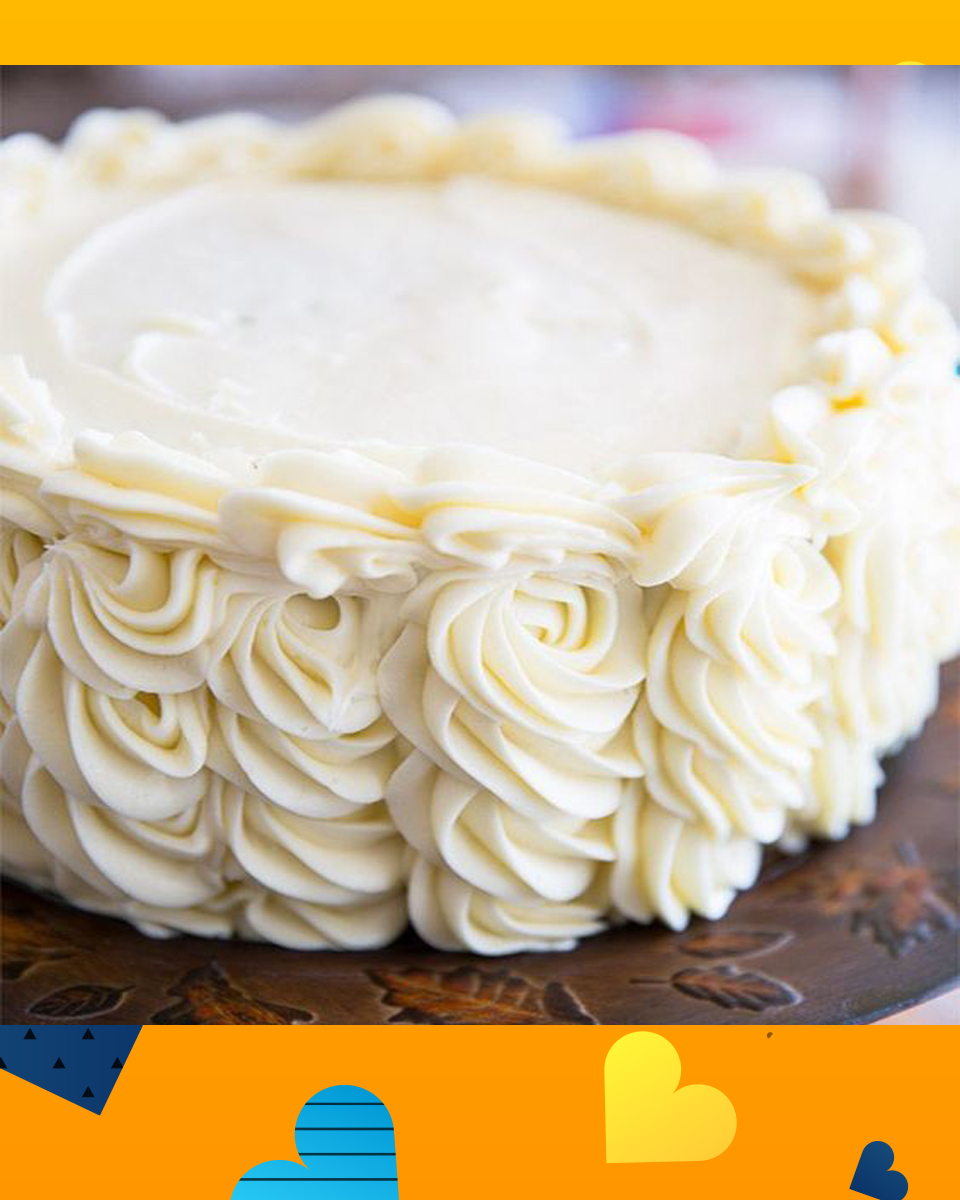
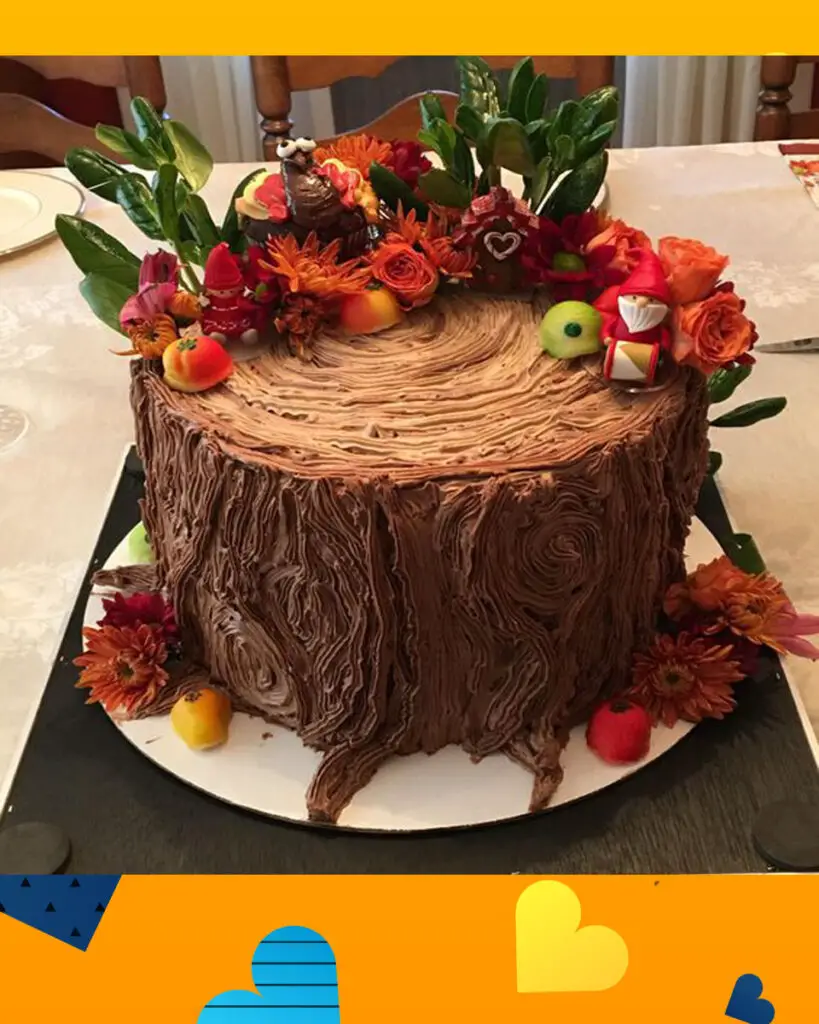
The Tree Stump Winter Cake is a whimsical and visually captivating dessert that evokes the enchanting beauty of the winter season. This cake, inspired by the natural world, is crafted to resemble a tree stump blanketed in snow. Its rich and moist layers, often featuring flavors like chocolate or spiced gingerbread, are adorned with intricate frosting details that mimic the texture of bark and the pristine white coating of freshly fallen snow. The Tree Stump Winter Cake is not only a treat for the taste buds but also a stunning centerpiece that adds a touch of rustic elegance to any winter celebration or holiday gathering.
What is Tree Stump Winter Cake?
A Tree Stump Winter Cake is a decorative and visually appealing cake designed to resemble the appearance of a tree stump covered in snow. These cakes are often made for winter-themed or holiday celebrations and are known for their creative and detailed decoration.
The typical components of a Tree Stump Winter Cake include:
- Cake Layers: The cake itself can be of various flavors, but chocolate and spiced gingerbread are popular choices to create a rich and cozy wintery taste.
- Frosting: The exterior of the cake is frosted with a textured, rustic-looking frosting that mimics the appearance of tree bark. This gives the cake a realistic tree stump effect.
- Decorations: To complete the winter theme, the cake is often adorned with edible decorations such as snowflakes, pine cones, and edible moss or lichen. Sometimes, small figurines or edible forest animals are added to enhance the woodland aesthetic.
- Snowy Finish: The cake is often dusted with powdered sugar or edible snow spray to create the illusion of freshly fallen snow, adding to the winter charm.
These cakes are not only visually impressive but also delicious, making them a delightful addition to winter celebrations, holiday parties, or rustic-themed events. The Tree Stump Winter Cake is a testament to the artistry of cake decoration, capturing the magic of the winter season in an edible and enchanting form.
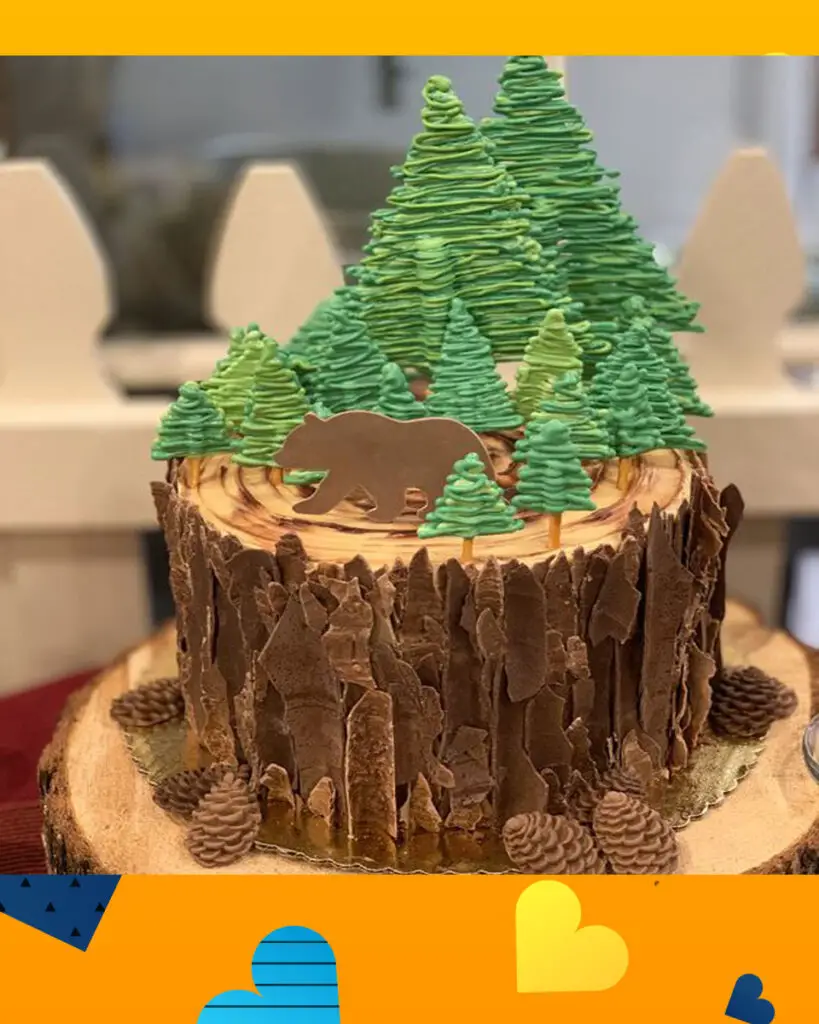
Why you will love Tree Stump Winter Cake?
- Aesthetic Delight: The cake’s intricate design and attention to detail make it visually stunning. The realistic tree stump appearance and snowy finish evoke the beauty of a winter wonderland, making it a captivating centerpiece for any celebration.
- Unique Theme: The tree stump and winter theme is a departure from typical cake designs, making it a distinctive and memorable choice for winter parties, holidays, and rustic-themed events.
- Flavor Variety: While the exterior design is a visual highlight, the cake’s interior can feature a variety of flavors, from rich chocolate to spiced gingerbread, ensuring a delightful taste experience.
- Creative Expression: Bakers often use their artistic skills and creativity to craft these cakes, resulting in a unique and handcrafted dessert that showcases their talents.
- Seasonal Charm: Tree Stump Winter Cakes are a perfect way to embrace the festive spirit of the winter season and create a warm and inviting atmosphere for your guests.
- Versatility: They can be customized to fit various occasions and can be adapted to suit different sizes and shapes, from single-tier cakes to multi-tiered masterpieces.
- Conversation Starter: These cakes are a great conversation starter at gatherings, as they often spark curiosity and admiration from guests.
- Taste and Texture: Beyond its appearance, a well-made Tree Stump Winter Cake offers a delicious and moist cake inside, creating a delightful balance of taste and texture.
- Memorable Photos: The cake’s unique design is sure to result in memorable photos that capture the magic of the moment and serve as lasting mementos.
In summary, a Tree Stump Winter Cake is not just a dessert but a work of art that brings together aesthetics and flavor, making it a wonderful addition to winter festivities and celebrations. Its ability to transport you to a winter wonderland and evoke a sense of seasonal charm is why many people love this creative and delectable treat.
Can I make a Tree Stump Winter Cake in advance?
Yes, you can make a Tree Stump Winter Cake in advance to save time and reduce stress on the day of your event. Here’s how you can do it:
- Cake Layers: Bake the cake layers as directed in your chosen recipe. Allow them to cool completely on wire racks.
- Wrap and Freeze: Once the cake layers have cooled, wrap them tightly in plastic wrap to prevent freezer burn. You can also double-wrap them by placing the plastic-wrapped layers in a resealable freezer bag. Ensure they are airtight.
- Label and Date: Write the date on the wrapped layers, so you can keep track of how long they’ve been in the freezer.
- Freeze: Place the wrapped cake layers in the freezer. It’s a good idea to use a flat surface in the freezer, so the layers don’t get distorted. If you have limited space, you can freeze them one by one and then stack them once they’re fully frozen.
- Thawing: When you’re ready to assemble the Tree Stump Winter Cake, remove the cake layers from the freezer and let them thaw in the refrigerator for several hours or overnight. This slow thawing process helps maintain the cake’s moisture and texture.
- Frost and Decorate: Once the cake layers are fully thawed, you can frost and decorate the cake as you normally would, following your chosen Tree Stump Winter Cake design.
By freezing the cake layers in advance, you can spread out the baking and decorating process, making it more convenient, especially when you have a busy schedule. Just ensure that the cake layers are well-wrapped and properly labeled to maintain their quality during storage in the freezer.
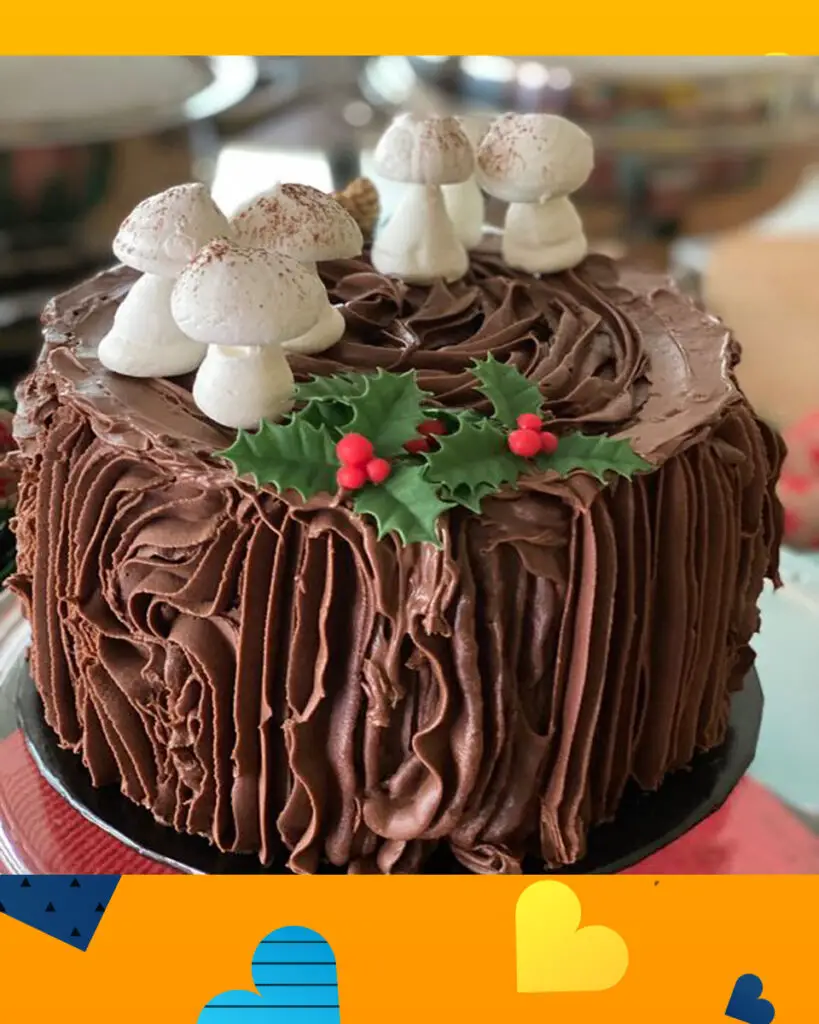
Tree Stump Winter Cake Recipe
Ingredients
Cake Layers:
- 2 cups (240g) all-purpose flour
- 2 cups (400g) granulated sugar
- 3/4 cup (65g) unsweetened cocoa powder
- 1 1/2 teaspoons baking powder
- 1 1/2 teaspoons baking soda
- 1 teaspoon salt
- 2 large eggs
- 1 cup (240ml) buttermilk
- 1/2 cup (120ml) vegetable oil
- 2 teaspoons pure vanilla extract
- 1 cup (240ml) boiling water
Frosting:
- 1 1/2 cups (345g) unsalted butter, softened
- 4 cups (480g) confectioners’ sugar (powdered sugar)
- 1/2 cup (40g) unsweetened cocoa powder
- 1/4 cup (60ml) heavy cream
- 2 teaspoons pure vanilla extract
Decorations:
- White frosting (for snow effect)
- Additional cocoa powder or brown food coloring (for tree bark effect)
- Edible decorations, such as snowflakes, edible pine cones, and figurines of forest animals
Instructions:
Cake Layers:
- Preheat your oven to 350°F (175°C). Grease and flour two 8-inch (20cm) round cake pans.
- In a large mixing bowl, sift together the flour, sugar, cocoa powder, baking powder, baking soda, and salt.
- Add the eggs, buttermilk, vegetable oil, and vanilla extract to the dry ingredients. Mix until well combined.
- Stir in the boiling water until the batter is smooth. The batter will be thin, but that’s okay.
- Pour the batter evenly into the prepared cake pans.
- Bake in the preheated oven for approximately 30-35 minutes or until a toothpick inserted into the center of the cakes comes out clean.
- Allow the cakes to cool in the pans for 10 minutes, then remove them from the pans and let them cool completely on wire racks.
Frosting:
- In a large mixing bowl, beat the softened butter until it’s creamy.
- Sift in the confectioners’ sugar and cocoa powder. Mix on low speed until the sugar is fully incorporated into the butter.
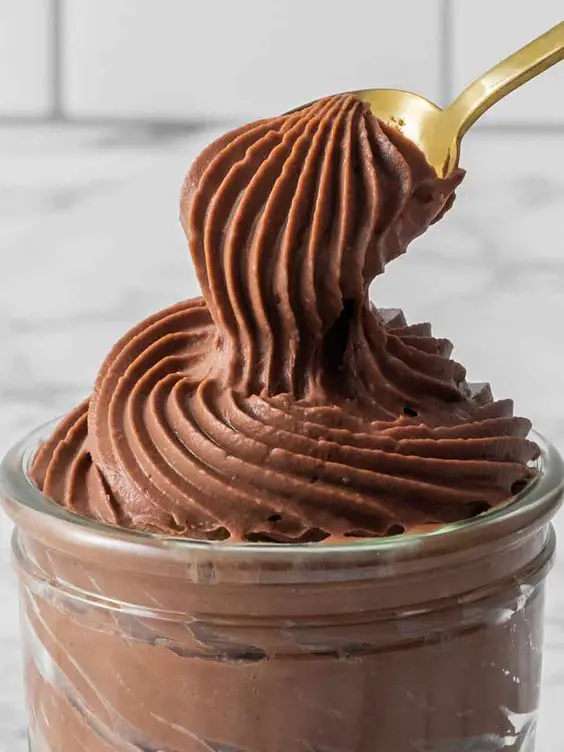
- Add the heavy cream and vanilla extract. Increase the speed to medium and beat until the frosting is smooth and fluffy. If it’s too thick, you can add a bit more cream.
Assembling and Decorating:
- Place one cake layer on your serving plate. Spread a layer of frosting on top of it.
- Place the second cake layer on top and frost the entire cake with a crumb coat (a thin layer of frosting that seals in the crumbs). Refrigerate the cake for about 30 minutes.
- Apply the final layer of frosting, creating a bark-like texture with a frosting spatula, cake comb, or by piping small lines of frosting.
- Use white frosting to create the snowy effect on top of the cake, ensuring it looks like freshly fallen snow.
- Decorate the cake with edible decorations like snowflakes, edible pine cones, and figurines of forest animals to complete the Tree Stump Winter Cake look.
Your Tree Stump Winter Cake is now ready to be served and enjoyed as a delicious and visually stunning dessert.
Nutrition information
Nutrition information for a Tree Stump Winter Cake can vary significantly depending on the specific recipe, portion sizes, and the type and quantity of decorations used. However, I can provide you with a rough estimate for a standard cake slice (about 1/12th of a two-layer 8-inch cake) without specific frosting or decoration details. Please note that this is an approximation, and the actual nutritional values may differ based on your recipe and serving sizes:
- Calories: Approximately 300-400 calories per slice
- Total Fat: Approximately 15-20 grams
- Saturated Fat: Approximately 7-10 grams
- Cholesterol: Approximately 50-70 milligrams
- Sodium: Approximately 200-300 milligrams
- Total Carbohydrates: Approximately 40-50 grams
- Dietary Fiber: Approximately 2-4 grams
- Sugars: Approximately 30-40 grams
- Protein: Approximately 4-6 grams
The frosting, decoration, and additional ingredients used, such as edible decorations or any additional layers of fillings, will add to the overall calories and nutritional content. Keep in mind that these values are rough estimates and may not account for variations in specific recipes and individual dietary needs.
For a precise nutritional breakdown, you may want to use a recipe calculator or consult the packaging of the specific ingredients you use to prepare your Tree Stump Winter Cake.
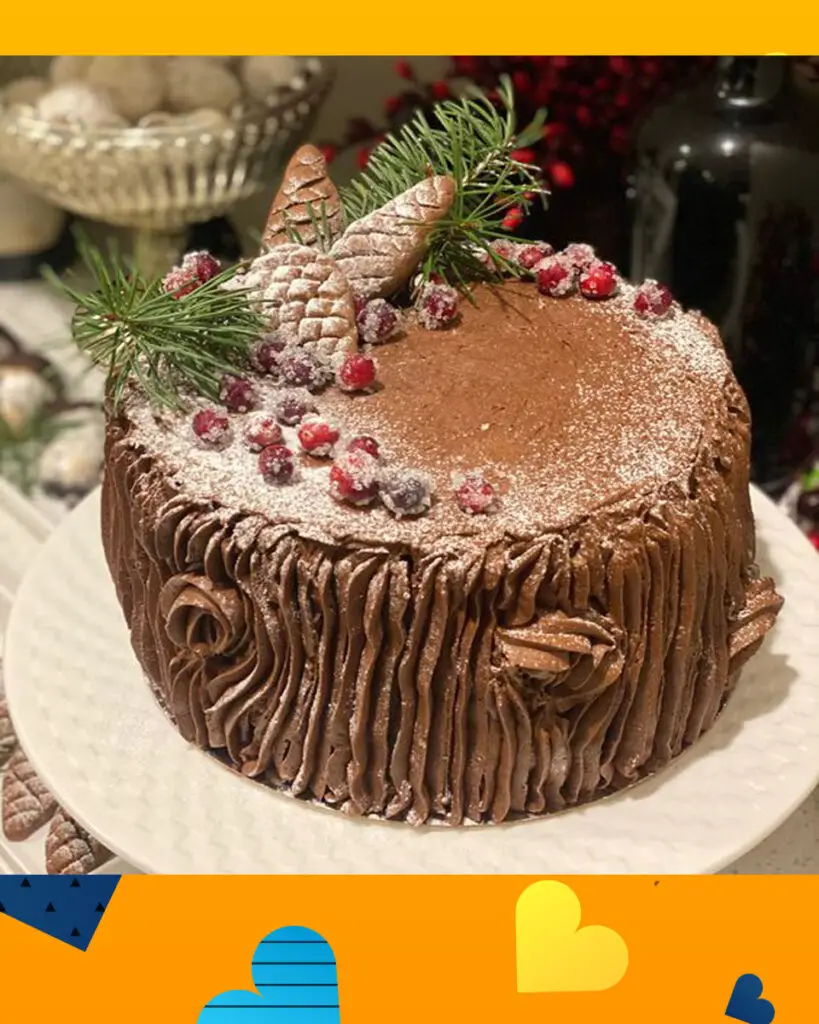
Tips to make perfect Tree Stump Winter Cake
Creating a perfect Tree Stump Winter Cake involves both creativity and precision. Here are some tips to help you achieve a stunning and delicious cake:
For the Cake Layers:
- Properly Measure Ingredients: Ensure accurate measurements of dry and wet ingredients, as precise measurements are crucial for the cake’s texture and taste.
- Sift Dry Ingredients: Sift the dry ingredients (flour, cocoa powder, etc.) to remove lumps and ensure a smooth batter.
- Use Quality Cocoa: If your cake flavor includes cocoa, use high-quality cocoa powder for a richer and more intense chocolate flavor.
- Boiling Water Technique: Adding boiling water to the batter creates a thin and smooth consistency. Don’t worry if the batter seems runny—it will bake beautifully.
- Even Cake Layers: When dividing the batter between cake pans, ensure they have an equal amount to avoid uneven cake layers. You can use a kitchen scale for precise measurements.
- Don’t Overbake: Avoid overbaking, as this can lead to dry cake layers. Check for doneness by inserting a toothpick into the center; it should come out clean or with a few moist crumbs.
For the Frosting:
- Cream the Butter Well: Cream the softened butter until it’s light and fluffy before adding the confectioners’ sugar and other ingredients for a smooth frosting.
- Control Consistency: Adjust the frosting’s consistency by adding more heavy cream or confectioners’ sugar as needed to achieve the right thickness for spreading and decorating.
- Create Realistic Bark Texture: To achieve the tree bark effect, use a frosting spatula, cake comb, or star-shaped piping tip to create textured lines on the frosting. Practice on a separate surface to perfect the technique.
Assembling and Decorating:
- Level Cake Layers: If your cake layers have a slight dome after baking, level them with a cake leveler or a serrated knife to ensure even stacking.
- Crumb Coat: Apply a crumb coat by frosting the cake with a thin layer before the final frosting. This helps seal in any loose crumbs and creates a smoother surface.
- Freeze Before Decorating: After applying the crumb coat, chill the cake in the refrigerator for about 30 minutes to firm up the frosting and make it easier to work with.
- Snowy Effect: To create a snowy effect on the cake, dust it with powdered sugar or use edible white food spray.
- Be Creative with Decorations: Use edible decorations like snowflakes, edible pine cones, or figurines of forest animals to complete the winter theme. These details can add a charming touch to your cake.
- Precision Matters: Take your time with decorations, especially if you’re adding detailed elements. The precision of your work can greatly enhance the cake’s visual appeal.
- Chill for Best Slicing: Before serving, chill the cake in the refrigerator for a short time to help with clean slicing.
By following these tips and practicing your decorating techniques, you can create a perfect Tree Stump Winter Cake that not only looks impressive but also tastes delicious. Don’t be discouraged if your first attempt isn’t flawless; cake decorating is an art that improves with practice.
How to serve
Serving a Tree Stump Winter Cake can be a delightful experience, as it’s not just a dessert but also a visual centerpiece. Here’s how to serve and enjoy your Tree Stump Winter Cake:
- Presentation: Place the Tree Stump Winter Cake on a decorative cake stand or serving platter that complements the wintery theme. This adds to the visual appeal and makes it a focal point at your gathering.
- Slicing: Use a sharp, clean knife to slice the cake. If you’ve chilled the cake, you’ll achieve cleaner slices. Wipe the knife between each slice for a neater presentation.
- Portion Sizes: A standard serving size is usually one cake slice, which is approximately 1/12th of the cake for an 8-inch round cake. However, you can adjust portion sizes based on your guests’ preferences and the number of servings needed.
- Accompaniments: You can serve Tree Stump Winter Cake on its own or with a few optional accompaniments:
- Whipped cream: A dollop of lightly sweetened whipped cream complements the cake’s richness.
- Vanilla ice cream: Serving a scoop of vanilla ice cream alongside the cake adds a cold and creamy contrast.
- Hot beverages: Offer a selection of hot drinks like coffee, tea, or hot cocoa to go with the cake. The warmth of the beverages pairs well with the winter theme.
- Garnishes: If desired, you can add a small edible garnish to each plate, such as a mint leaf or a dusting of cocoa powder, to enhance the visual appeal.
- Elegant Serving: When serving, make sure to present each slice neatly on a plate with attention to detail. The way you present the cake can be just as impressive as its appearance.
- Celebrate and Enjoy: Encourage your guests to savor the flavors and take in the artistry of the cake. It’s a treat for both the taste buds and the eyes, so don’t rush the experience.
- Store Any Leftovers: If there are leftover slices, store them in an airtight container in the refrigerator to maintain freshness.
Remember that a Tree Stump Winter Cake not only offers delicious flavors but also serves as a conversation starter and a centerpiece at your gathering. The combination of artful design and delightful taste makes it a memorable addition to your winter celebrations, holiday parties, or any special occasion.
How to store Tree Stump Winter Cake
Storing your Tree Stump Winter Cake properly is essential to maintain its freshness and appearance. Here’s how to store it:
- Refrigeration: If your Tree Stump Winter Cake has a frosting or filling that requires refrigeration (e.g., cream cheese frosting or any dairy-based filling), it should be stored in the refrigerator. Keep it in an airtight container or cover it with plastic wrap to prevent the cake from absorbing any refrigerator odors.
- Room Temperature: If your cake has a non-perishable frosting or filling (e.g., buttercream) and the room temperature is moderate (around 70°F or 21°C), you can store it at room temperature for a day or two. Make sure it’s covered with a cake keeper or a cake dome to protect it from dust and contaminants.
- Freezing: If you plan to store the Tree Stump Winter Cake for an extended period, you can freeze it. Here’s how:
- Place the cake in the freezer, uncovered, until the frosting becomes firm.
- Wrap the cake in several layers of plastic wrap to prevent freezer burn.
- Place the wrapped cake in an airtight container or a freezer-safe bag for added protection.
- Label the container with the date and type of cake for easy identification.
- Freeze for up to a few months.
- Thawing Frozen Cake: When you’re ready to enjoy a frozen Tree Stump Winter Cake, remove it from the freezer, unwrap it, and allow it to thaw in the refrigerator for several hours or overnight. Thawing it slowly helps maintain the cake’s moisture and texture. You can also bring the cake to room temperature before serving.
- Avoid Moisture: Be cautious about moisture, especially when transitioning between cold and warm environments. Condensation can affect the appearance of the cake. Allow the cake to reach room temperature before serving if it has been refrigerated or frozen.
- Store Decorations Separately: If your cake has delicate edible decorations, it’s often better to store them separately from the cake and add them just before serving to maintain their appearance.
Remember that the specific storage requirements can vary based on the frosting and fillings used in your Tree Stump Winter Cake, so it’s important to consider the perishable components when determining how to store it. Proper storage ensures that your cake remains fresh and visually appealing, whether you plan to enjoy it within a day or save it for a special occasion in the future.
FAQ’s
- What flavors are commonly used for the cake layers?
- Chocolate and spiced gingerbread are popular choices, as they offer rich, wintery flavors. However, you can use any cake flavor you prefer.
- How do I achieve the tree bark texture on the frosting?
- The tree bark texture can be created using various techniques, such as using a textured frosting spatula, a cake comb, or piping on frosting with a star-shaped tip. Experiment with different methods to achieve the desired texture.
- Can I make a Tree Stump Winter Cake in advance?
- Yes, you can prepare the cake layers in advance and freeze them. Frost and decorate the cake closer to your event for the freshest appearance.
- What decorations can I use on the cake to enhance the winter theme?
- Common decorations include edible snowflakes, powdered sugar “snow,” edible pine cones, and small figurines of forest animals. You can also use edible moss or lichen for added realism.
- How do I store a Tree Stump Winter Cake?
- Store the cake in the refrigerator if it’s already frosted and decorated. If not, you can refrigerate the cake layers and frost it closer to the serving time.
Troubleshooting Tips:
- Cracking Frosting: If the frosting is cracking, it may be too dry or overmixed. Adjust the frosting’s consistency by adding a little more liquid (milk or cream) or gently re-whipping it.
- Uneven Frosting Texture: Achieving a consistent bark texture can be challenging. Practice your technique on a separate surface before frosting the cake to get a feel for it. If it’s uneven, gently scrape off the frosting and start again.
- Sinking Cake Layers: If your cake layers sink in the middle, it may be due to underbaking or opening the oven door too early during baking. Ensure the cake is fully baked, and avoid opening the oven prematurely.
- Bland Flavor: If the cake lacks flavor, consider adding more spices, extracts, or ingredients like cocoa powder to enhance the taste.
- Bulging Layers: If the cake layers bulge out in the center, it’s typically caused by overfilling with frosting or not leveling the layers properly. Use a cake leveler to ensure even layers, and avoid excessive frosting between them.
- Crumbly Cake: A crumbly cake can result from overbaking or using too much flour. Ensure you follow the recipe closely and don’t overmix the batter.
- Soggy Cake: Avoid storing the cake in a humid environment or airtight container to prevent moisture from making the cake layers soggy.
Remember that decorating a Tree Stump Winter Cake may require some practice, and perfection may come with experience. Don’t be discouraged by any initial challenges, as the process can be quite enjoyable, and the final result is usually worth the effort.
Happy baking!

